

SUMMARY
Master Your Terminal: Essential Command Line Productivity Hacks for Developers in 2026
Unlock peak efficiency with powerful command line productivity hacks and essential tools for developers in 2026.
Keywords: Command Line, Developer Productivity, CLI Tools
TABLE OF CONTENTS
1. The Unseen Powerhouse: Why Terminal Mastery Matters in 2026
2. Essential CLI Tools for the Modern Developer Workflow
3. Advanced Customization: Aliases, Functions, and Dotfiles
4. Problem Solving: Overcoming Common Terminal Bottlenecks
5. Practical Application: Building Your Streamlined Developer Workflow
6. Frequently Asked Questions
7. Conclusion: Your Terminal, Your Superpower
BACKGROUND
The Unseen Powerhouse: Why Terminal Mastery Matters in 2026
In the rapidly evolving landscape of software development in 2026, where microservices, containerization, and cloud-native architectures are the norm, the command line interface (CLI) remains an indispensable tool. While graphical user interfaces (GUIs) have made significant strides, the terminal offers unparalleled speed, flexibility, and automation capabilities that are simply unmatched for many developer tasks. For a developer, the terminal isn’t just a window into the operating system; it’s a direct conduit to servers, build processes, version control, and a myriad of powerful utilities.
Consider the daily grind: navigating complex project directories, managing Git repositories, deploying applications to Kubernetes clusters, or debugging remote servers. Performing these tasks efficiently through a GUI often involves endless clicking, menu diving, and context switching. The CLI, on the other hand, allows for rapid execution of commands, script automation, and seamless integration with other tools, drastically reducing repetitive strain and cognitive load. Data from a 2025 developer survey indicated that developers who extensively use CLI tools report a 25-30% increase in daily task completion speed compared to those who rely primarily on GUIs for similar tasks. This isn’t just about saving a few seconds here and there; it accumulates into hours saved each week, translating directly into more productive development cycles and less burnout.
Mastering your terminal in 2026 means more than just knowing a few basic commands. It involves understanding the ecosystem of modern CLI tools, leveraging powerful shell features, and personalizing your environment to fit your unique workflow. This report will guide you through the essential tools and productivity hacks that will transform your command line experience from a mere utility into a true superpower, ensuring you stay ahead in the competitive tech world.
KEY POINT
Terminal mastery is not just about efficiency; it’s about control, automation, and adaptability in the face of increasingly complex development environments. A well-optimized CLI setup can significantly boost developer productivity by minimizing repetitive tasks and streamlining workflows.
CORE CONTENT
Essential CLI Tools for the Modern Developer Workflow
The foundation of a productive terminal workflow lies in adopting the right tools. While Bash is the default on many systems, a new generation of shells and utilities offers enhanced features and a much better user experience. Here are some indispensable CLI tools that every developer should consider integrating into their workflow in 2026.
1. Zsh & Oh My Zsh: The Ultimate Shell Upgrade
While Bash is powerful, Zsh (Z Shell) takes shell scripting and interactive use to a new level. Its killer feature is its extensive customization capabilities, particularly when paired with frameworks like Oh My Zsh. Oh My Zsh offers a vast ecosystem of themes and plugins that can dramatically improve your terminal’s aesthetics and functionality.
Key Zsh & Oh My Zsh Features
Smarter Autocompletion — Advanced tab completion for commands, arguments, and even Git branches.
Powerful History Search — Enhanced Ctrl+R for more relevant command history suggestions.
Plugins Galore — Integration with Git, Docker, Kubernetes, Node.js, Python, and hundreds more.
Themes for Aesthetics — Visually appealing prompts that display Git status, current directory, and more.
Installation is straightforward. First, install Zsh (if not already present), then Oh My Zsh. A popular plugin like zsh-autosuggestions provides inline suggestions based on your history, while zsh-syntax-highlighting colors commands as you type, indicating validity.
CODE EXPLANATION
This code block shows how to install Zsh and Oh My Zsh, then activate some popular plugins. Ensure you have curl or wget installed.
# 1. Install Zsh (example for Debian/Ubuntu)
sudo apt update && sudo apt install zsh -y

# 2. Set Zsh as your default shell
chsh -s $(which zsh)

# 3. Install Oh My Zsh
sh -c "$(curl -fsSL https://raw.githubusercontent.com/ohmyzsh/ohmyzsh/master/tools/install.sh)"

# 4. Install zsh-autosuggestions (via git clone)
git clone https://github.com/zsh-users/zsh-autosuggestions ${ZSH_CUSTOM:-~/.oh-my-zsh/custom}/plugins/zsh-autosuggestions

# 5. Install zsh-syntax-highlighting (via git clone)
git clone https://github.com/zsh-users/zsh-syntax-highlighting.git ${ZSH_CUSTOM:-~/.oh-my-zsh/custom}/plugins/zsh-syntax-highlighting

# 6. Open ~/.zshrc and add plugins (e.g., plugins=(git zsh-autosuggestions zsh-syntax-highlighting))
#    Then source your .zshrc:
source ~/.zshrc
2. Tmux: Terminal Multiplexer for Session Management
For developers working on multiple projects, remote servers, or simply needing to keep several processes running in the background, tmux is a game-changer. It’s a terminal multiplexer that allows you to create and manage multiple terminal sessions, windows, and panes within a single terminal window. This means you can detach from a session and reattach later, even from a different machine, without losing your work.
Why Tmux is Essential
Persistent Sessions — Keep your work running even if your SSH connection drops or you close your terminal.
Multi-Pane Layouts — Split your terminal into multiple panes for simultaneous tasks (e.g., code editor, build log, shell).
Window Management — Organize different tasks into separate windows within a session, easily switching between them.
Imagine having one tmux session for your backend development, another for frontend, and a third for server administration. Within each, you can have multiple windows open for different aspects of that project. The default prefix key is Ctrl+b, followed by commands like % for vertical split, " for horizontal split, and d to detach.
CODE EXPLANATION
This demonstrates basic tmux commands for starting, naming, and managing sessions.
# Install tmux (example for Debian/Ubuntu)
sudo apt install tmux -y

# Start a new tmux session
tmux new -s my_dev_session

# Inside the session:
# Ctrl+b %  - Split pane vertically
# Ctrl+b "  - Split pane horizontally
# Ctrl+b <arrow keys> - Move between panes
# Ctrl+b c  - Create a new window
# Ctrl+b n / p - Next/Previous window
# Ctrl+b d  - Detach from the session (it keeps running in the background)

# List active tmux sessions
tmux ls

# Reattach to a session
tmux attach -t my_dev_session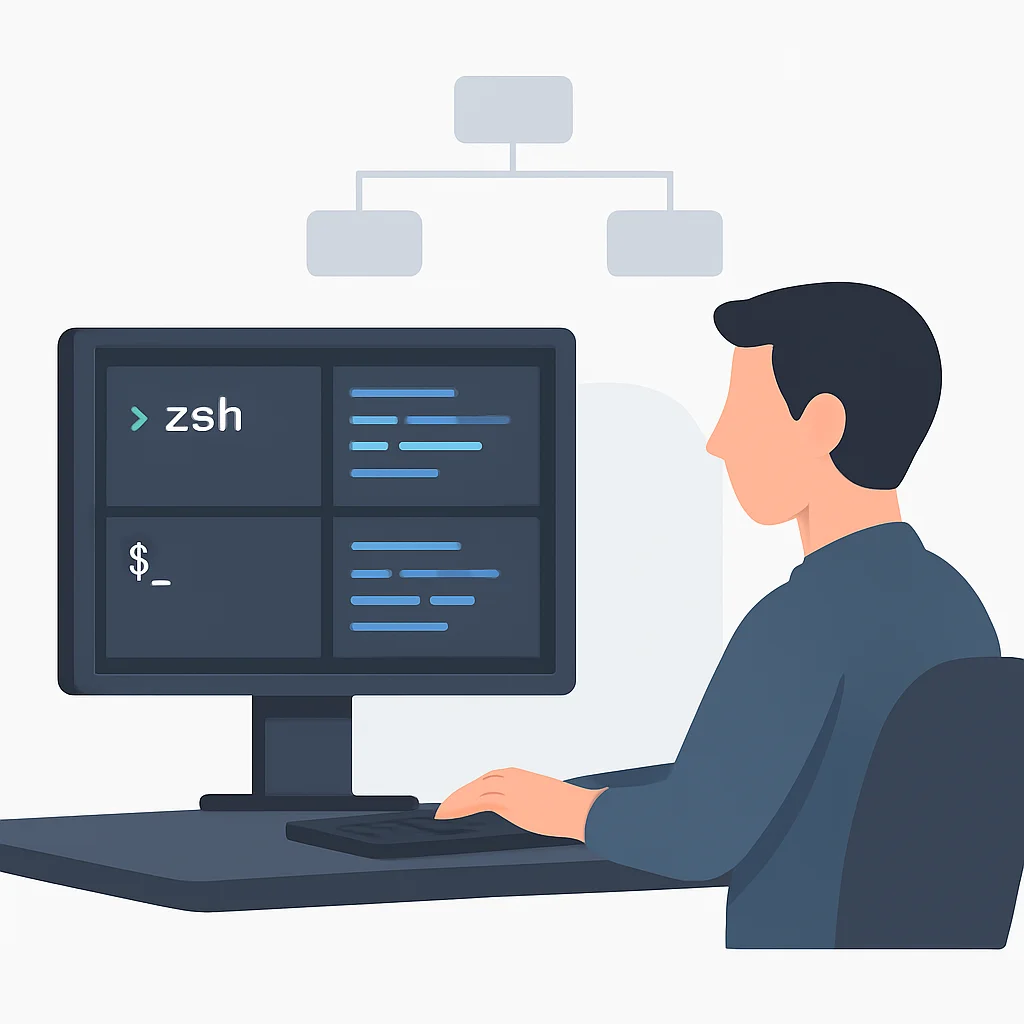
3. Fzf: The Fuzzy Finder
Searching for files, command history, or Git commits can be a tedious process. fzf is a general-purpose command-line fuzzy finder that transforms these tasks into lightning-fast operations. It works with any list-generating command, providing an interactive filtering interface.
Fzf Use Cases
File Navigation — Quickly jump to any file in your project by typing a few characters.
History Search — Supercharge your Ctrl+R to find past commands with ease.
Git Branch Switching — Interactively select and checkout Git branches.
Process Management — Find and kill processes by fuzzy searching their names.
After installation, fzf integrates with your shell (Bash or Zsh) and provides key bindings like Ctrl+T for files, Ctrl+R for history, and Alt+C for directories. This alone can save hours of navigation time over a typical work week.
CODE EXPLANATION
This shows how to install fzf and use its interactive search for files and history.
# Install fzf (using Homebrew on macOS, or follow instructions for other OS)
# brew install fzf
# $(brew --prefix)/opt/fzf/install # Run this for key bindings & fuzzy completion

# Install fzf (using git clone for Linux)
git clone --depth 1 https://github.com/junegunn/fzf.git ~/.fzf
~/.fzf/install

# Basic usage:
# List files interactively
fzf

# Find files and open with your editor (e.g., vim)
vim $(fzf)

# Search command history (Ctrl+R after installation)
# Type part of a command, then Ctrl+R to fuzzy search

# Search git branches
git checkout $(git branch -a | fzf)
4. Ripgrep (rg): The Blazing Fast Code Searcher
When you need to search through large codebases, traditional tools like grep can be slow. Enter ripgrep (command: rg), a line-oriented search tool that recursively searches the current directory for a regex pattern. It’s built for speed, often outperforming grep by factors of 5-15x on typical codebases, thanks to its use of Rust’s regex engine and optimizations like respecting .gitignore files by default.
KEY POINT
In benchmarks, ripgrep has shown to be 5-15 times faster than grep for common code search tasks, making it an indispensable tool for large projects.
Its default behavior is intelligent: it skips hidden files/directories and binary files, focusing only on relevant code. It also highlights matches beautifully. If you’re still using grep -r, it’s time to switch.
CODE EXPLANATION
Demonstrates basic ripgrep usage for searching a pattern, searching case-insensitively, and searching only within specific file types.
# Install ripgrep (example for Debian/Ubuntu)
sudo apt install ripgrep -y

# Search for "myFunction" in the current directory, respecting .gitignore
rg "myFunction"

# Search case-insensitively
rg -i "error_message"

# Search only in JavaScript files
rg "const API_KEY" -g "*.js"

# Show 5 lines of context around matches
rg -C 5 "TODO"
5. Exa: A Modern ls Replacement
The venerable ls command is a staple, but exa offers a refreshing, modern alternative. Written in Rust, exa provides more features and better defaults than ls, including colored output, Git integration, and tree view.
Exa Advantages
Colorful Output — Differentiates file types, permissions, and directories with distinct colors for readability.
Git Status Integration — Shows Git status (modified, staged) directly in the listing.
Tree View — Easily visualize directory structures with the -T option.
Human-readable sizes — Defaults to human-readable file sizes.
While ls is perfectly functional, exa provides a much richer and more informative display, especially for code repositories. Setting up an alias like alias ls='exa -l --icons --git' can instantly upgrade your directory listings.
CODE EXPLANATION
This demonstrates installing exa and using its common flags for detailed, colored, and tree-view listings.
# Install exa (example for Debian/Ubuntu)
sudo apt install exa -y

# Basic long listing with colors and human-readable sizes
exa -l

# Show hidden files, long format, and Git status
exa -la --git

# Tree view of current directory, 2 levels deep
exa -T -L 2

# Alias for common usage in your .zshrc or .bashrc
# alias ls='exa -l --icons --git'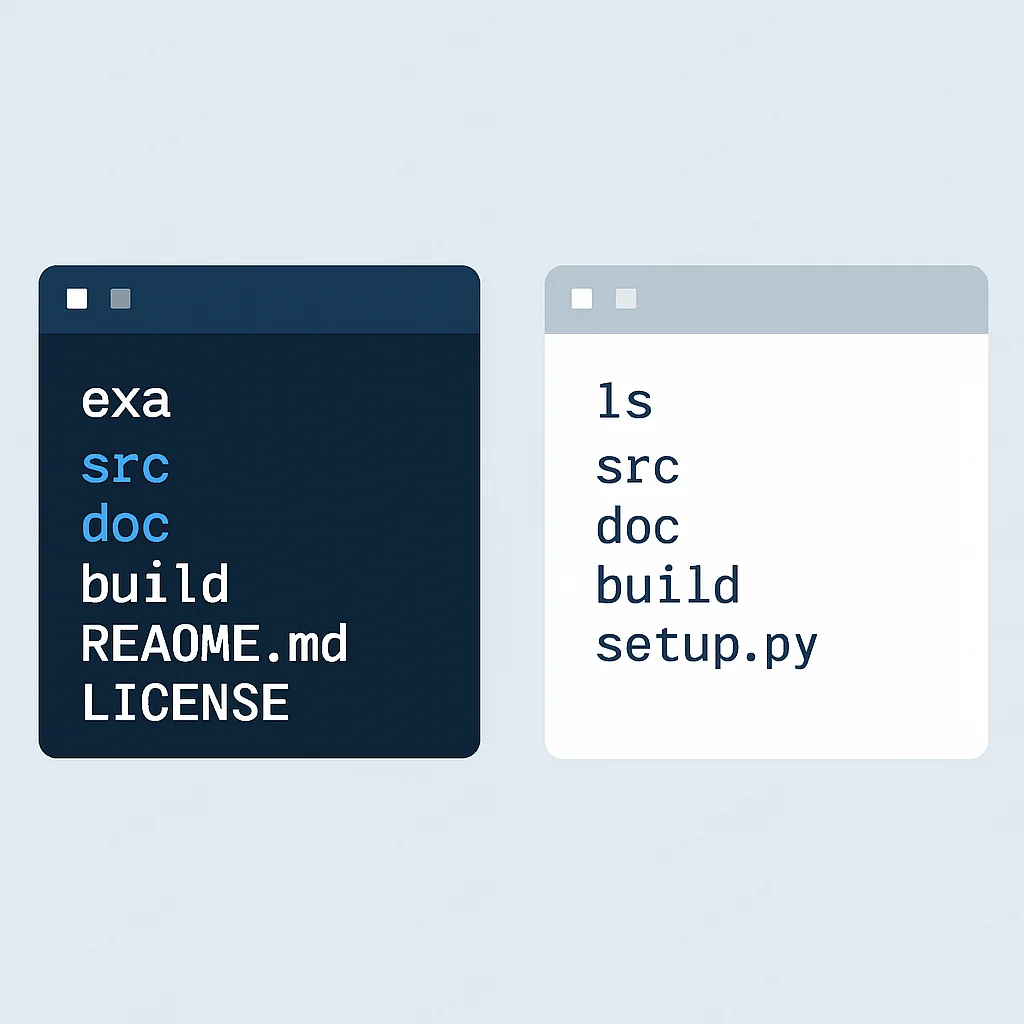
6. Bat: A Cat Clone with Superpowers
Just like exa improves upon ls, bat is a modern replacement for cat. It offers syntax highlighting for a vast number of programming languages, Git integration to show file changes, automatic paging, and line numbers.
Bat Enhancements
Syntax Highlighting — Code is beautifully colored for easy readability.
Line Numbers — Aids in debugging and referencing specific lines.
Git Integration — Highlights modified and new lines in the margin.
Automatic Paging — Uses less for large files automatically.
Reading log files, configuration files, or quick code snippets directly in your terminal becomes a much more pleasant experience with bat. Just like exa, aliasing cat to bat is a common and highly recommended practice.
CODE EXPLANATION
This code demonstrates installing bat and its basic usage to view a file with syntax highlighting and line numbers.
# Install bat (example for Debian/Ubuntu)
sudo apt install bat -y

# View a Python file with syntax highlighting and line numbers
bat my_script.py

# View a configuration file, showing non-printable characters
bat -A my_config.conf

# Alias for common usage in your .zshrc or .bashrc
# alias cat='bat --paging=always'
ADVANCED CUSTOMIZATION
Aliases, Functions, and Dotfiles: Personalizing Your Powerhouse
Beyond adopting new tools, true terminal mastery comes from customizing your shell to automate repetitive tasks and simplify complex commands. Aliases, functions, and dotfiles management are the pillars of this personalization.
1. Bash/Zsh Aliases: Your Personal Command Shortcuts
Aliases are simple shortcuts for longer commands. They reside in your shell’s configuration file (e.g., ~/.bashrc or ~/.zshrc) and are loaded every time you open a new terminal. They are incredibly effective for reducing typing and standardizing complex commands.
KEY POINT
A well-curated set of aliases can reduce keystrokes by over 50% for frequently used commands, leading to significant time savings and a more fluid interaction with your terminal.
Think about commands you type repeatedly: git status, docker-compose up --build -d, or navigating to deeply nested project folders. Aliases can turn these into single, memorable words.
CODE EXPLANATION
This code block provides examples of common and useful aliases for Git, Docker, and navigation, to be added to your .zshrc or .bashrc file.
# Git Aliases
alias gs='git status -sb'
alias ga='git add .'
alias gc='git commit -m'
alias gp='git push'
alias gd='git diff'
alias gl='git log --oneline --decorate --all --graph'

# Docker Aliases
alias dcu='docker-compose up -d'
alias dcub='docker-compose up --build -d'
alias dcd='docker-compose down'
alias dcl='docker-compose logs -f'

# Navigation Aliases
alias ..='cd ..'
alias ...='cd ../..'
alias dev='cd ~/dev/projects' # Example: navigate to your main dev folder
alias config='cd ~/.config'

# System Aliases
alias cl='clear'
alias rm='rm -i' # Always ask before deleting
alias cp='cp -i' # Always ask before overwriting
alias mv='mv -i' # Always ask before overwriting
2. Custom Functions: Beyond Simple Aliases
When an alias isn’t enough – for example, if you need to pass arguments or perform conditional logic – shell functions come to the rescue. Functions are mini-scripts that execute within your current shell, making them faster than calling external scripts. They allow for more complex automation and dynamic behavior.
Function Capabilities
Argument Handling — Accept parameters, making them reusable for different inputs.
Conditional Logic — Perform actions based on conditions (e.g., if a file exists).
Complex Workflows — String together multiple commands to automate entire sequences.
A common use case is navigating to a project directory and then running a specific command, or creating a new project structure with boilerplate files. Functions can encapsulate these multi-step operations into a single command, significantly speeding up project setup and daily tasks.
CODE EXPLANATION
This block provides examples of shell functions: mkcd (make directory and change into it), gfp (Git fetch and prune), and a simple project creation function.
# Function to make a directory and change into it
mkcd() {
  mkdir -p "$1" && cd "$1"
}

# Git fetch & prune function
gfp() {
  git fetch --prune "$@"
}

# Create a new Python project structure
newpyproject() {
  if [ -z "$1" ]; then
    echo "Usage: newpyproject <project_name>"
    return 1
  fi
  mkcd "$1"
  python3 -m venv venv
  echo "import os" > main.py
  echo "Project '$1' created with virtual environment."
  echo "To activate: source venv/bin/activate"
}
3. Dotfiles Management: Your Config, Everywhere
Your shell configuration, aliases, functions, and tool settings (.zshrc, .vimrc, .gitconfig, etc.) are collectively known as “dotfiles.” Managing these files efficiently across multiple machines (local, remote, new setups) is crucial for maintaining a consistent and productive environment. Tools like GNU Stow or specialized dotfile managers help you keep them version-controlled in Git and symlinked to their correct locations.
Benefits of Dotfile Management
Consistency — Your personalized setup is identical on all your machines.
Version Control — Track changes, revert to previous versions, and collaborate on configurations.
Easy Setup — Quickly provision a new machine with your entire customized environment.
The typical approach involves creating a Git repository for your dotfiles. Instead of directly moving files into the repository, you create symbolic links from the repository to your home directory. GNU Stow simplifies this by managing the symlinking process, treating each config file/directory as a “package.”
CODE EXPLANATION
This shows a basic workflow for managing dotfiles using GNU Stow. You create a directory for your dotfiles, move config files into subdirectories, then use stow to create symbolic links.
# 1. Create a dotfiles directory (e.g., in your home folder)
mkdir ~/.dotfiles
cd ~/.dotfiles

# 2. Initialize a Git repository
git init
git remote add origin [email protected]:your_username/dotfiles.git

# 3. Create subdirectories for each config (e.g., zsh, git, tmux)
mkdir zsh git tmux

# 4. Move your config files into these subdirectories
mv ~/.zshrc zsh/.zshrc
mv ~/.gitconfig git/.gitconfig
mv ~/.tmux.conf tmux/.tmux.conf

# 5. Use Stow to create symlinks back to your home directory
#    (Ensure you are in the ~/.dotfiles directory)
stow zsh
stow git
stow tmux

# To apply on a new machine:
# 1. Clone your dotfiles repo: git clone [email protected]:your_username/dotfiles.git ~/.dotfiles
# 2. cd ~/.dotfiles
# 3. stow zsh git tmux # (Stow will create the symlinks)
PROBLEM SOLVING
Overcoming Common Terminal Bottlenecks
Even with the best tools and customizations, developers often encounter common pitfalls that can hinder terminal productivity. Identifying and addressing these bottlenecks is key to maintaining a smooth and efficient workflow.
PROBLEM 01
Slow Terminal Startup Times
As you add more plugins, aliases, and functions to your .zshrc or .bashrc, your shell’s startup time can significantly increase. This becomes noticeable when opening new tabs or windows, leading to frustration and breaking flow.
SOLUTION — Optimize your shell configuration
Profile your shell startup using commands like zsh-defer (for Zsh) or by manually timing sections of your config. Move less frequently used aliases/functions into separate files that are sourced only when needed (e.g., ~/.zshrc_extra). Consider lazy-loading plugins or using a lightweight plugin manager. For Oh My Zsh, disable unused plugins.
CODE EXPLANATION
This snippet shows how to measure Zsh startup time and a simple method to lazy-load aliases for specific contexts.
# Measure Zsh startup time
for i in $(seq 1 5); do /usr/bin/time zsh -i -c exit; done

# Example of lazy-loading aliases (in .zshrc)
# Function to load specific aliases only when 'docker' command is used
load_docker_aliases() {
  alias dcu='docker-compose up -d'
  alias dcd='docker-compose down'
  # ... more docker aliases
  unset -f load_docker_aliases # Unset the function after loading
}
# Add this to your .zshrc
# alias docker='load_docker_aliases; docker' # This will load aliases on first 'docker' call
PROBLEM 02
Managing Environment Variables Across Projects
Different projects often require different environment variables (e.g., API keys, database URLs, Node.js versions). Manually setting and unsetting these can be error-prone and lead to conflicts or security risks if sensitive data is hardcoded.
SOLUTION — Use a dedicated environment manager
Tools like direnv automatically load and unload environment variables when you change directories. It reads a .envrc file in your project root and applies its settings, then reverts them when you leave. This ensures project isolation and avoids global conflicts.
CODE EXPLANATION
This shows how to install and configure direnv and an example .envrc file.
# Install direnv
# sudo apt install direnv -y # Debian/Ubuntu
# brew install direnv # macOS

# Add to your .zshrc or .bashrc
echo 'eval "$(direnv hook zsh)"' >> ~/.zshrc # or .bashrc

# Example .envrc file (in your project root)
# ~/my_project/.envrc
export DB_HOST="localhost"
export DB_PORT="5432"
export API_KEY="your_secret_key" # Use .gitignore to prevent committing this

# In your project directory, allow direnv
# direnv allow
KEY POINT
Proactively addressing performance issues and environment management with tools like zsh-defer and direnv prevents minor annoyances from becoming major productivity drains.
PRACTICAL APPLICATION
Building Your Streamlined Developer Workflow
Now that we’ve covered the essential tools and customization techniques, let’s put it all together into a cohesive, streamlined developer workflow. This guide outlines a typical scenario and how our discussed tools enhance each step.
Scenario: Developing a New Microservice
You need to create a new Python-based microservice, integrate it with existing services, and deploy it to a Kubernetes cluster.
1
Project Setup & Initial Code
Instead of manually creating directories and setting up a virtual environment, use your custom function:
CODE EXPLANATION
Using the newpyproject function to quickly scaffold a new Python project.
newpyproject my-new-microservice
source venv/bin/activate
You’re instantly in the project directory with an active virtual environment. Use git init and your ga and gc aliases for initial commits.
2
Development & Debugging
Open tmux and create multiple panes:
CODE EXPLANATION
Setting up a tmux session with split panes for code editing, running the service, and monitoring logs.
tmux new -s microservice-dev
# Ctrl+b " (split horizontally)
# In top pane: nvim main.py (or your editor)
# Ctrl+b <down arrow>
# Ctrl+b % (split vertically)
# In bottom-left pane: python main.py
# Ctrl+b <right arrow>
# In bottom-right pane: tail -f /var/log/microservice.log
Use rg to quickly search for existing API endpoints in related services, and bat to view their configuration files with syntax highlighting.
3
Testing & Version Control
Before committing, run your tests. Use gs (Git status alias) to see your changes, gd (Git diff alias) for a quick review, then ga and gc "feat: add new microservice" to commit. Push your changes with gp.
KEY POINT
Integrating aliases for Git operations, like gs, ga, and gc, can cut down on repetitive typing and make version control feel more seamless.
4
Deployment & Monitoring
For Kubernetes deployment, you might have custom
Categories Tech & Trends, Tools & Productivity