
SUMMARY
Advanced React Performance Optimization
Master modern techniques for lightning-fast React applications with code splitting, lazy loading, and bundle optimization.
Keywords: Code Splitting, React.lazy, Bundle Analysis
TABLE OF CONTENTS
1. Performance Crisis in Modern React Apps
2. Code Splitting Fundamentals
3. React.lazy and Suspense Implementation
4. Advanced Bundle Analysis Techniques
5. Dynamic Loading Strategies
6. Performance Monitoring and Optimization
7. Real-world Implementation Guide
PERFORMANCE ANALYSIS
Performance Crisis in Modern React Apps
In 2026, React applications face unprecedented performance challenges. With the average JavaScript bundle size reaching 1.2MB and Time to Interactive (TTI) exceeding 8.5 seconds on mobile devices, performance optimization has become critical for user retention and business success.
CRITICAL PERFORMANCE DATA
Studies show that 53% of users abandon mobile sites that take longer than 3 seconds to load. For every 100ms delay in load time, conversion rates drop by 7%.
The Bundle Size Problem
Modern React applications suffer from massive initial bundle sizes due to several factors:
Bundle Size Contributors (Typical Enterprise App)
React + ReactDOM — 42.2KB (gzipped)
Third-party libraries — 850KB average
Application code — 320KB average
Total initial bundle — 1.2MB+ (before optimization)
Without proper optimization, users download and parse JavaScript they may never use, leading to poor Core Web Vitals scores and degraded user experience.

KEY POINT
Code splitting can reduce initial bundle size by 60-80% and improve First Contentful Paint (FCP) by up to 2.3 seconds on mobile devices.
IMPLEMENTATION GUIDE
Code Splitting Fundamentals
Code splitting is the process of dividing your application into smaller chunks that can be loaded on-demand. Instead of downloading one massive bundle, users receive only the code they need for the current page or feature.
Dynamic Import Strategy
The foundation of modern code splitting lies in dynamic imports, which create natural split points in your application:
CODE EXPLANATION
This example demonstrates basic dynamic importing with error handling and loading states for optimal user experience.
// Traditional static import (loads everything upfront)
import Dashboard from './components/Dashboard';
import Analytics from './components/Analytics';
import Settings from './components/Settings';

// Dynamic import approach (loads on-demand)
const loadDashboard = () => import('./components/Dashboard');
const loadAnalytics = () => import('./components/Analytics');
const loadSettings = () => import('./components/Settings');

// Advanced dynamic loading with error handling
const loadComponentWithFallback = async (importFn, fallbackComponent) => {
  try {
    const module = await importFn();
    return module.default;
  } catch (error) {
    console.error('Component loading failed:', error);
    return fallbackComponent;
  }
};
Route-Based Code Splitting
The most effective approach is splitting at the route level, ensuring users only download code for pages they visit:
CODE EXPLANATION
This React Router setup with code splitting reduces initial bundle size by lazy-loading route components only when needed.
import { BrowserRouter as Router, Routes, Route } from 'react-router-dom';
import { Suspense, lazy } from 'react';

// Lazy load route components
const Home = lazy(() => import('./pages/Home'));
const Dashboard = lazy(() => import('./pages/Dashboard'));
const Analytics = lazy(() => import('./pages/Analytics'));
const Settings = lazy(() => import('./pages/Settings'));

// Loading fallback component
const LoadingFallback = () => (
  <div className="loading-container">
    <div className="spinner"></div>
    <p>Loading...</p>
  </div>
);

function App() {
  return (
    <Router>
      <Suspense fallback={<LoadingFallback />}>
        <Routes>
          <Route path="/" element={<Home />} />
          <Route path="/dashboard" element={<Dashboard />} />
          <Route path="/analytics" element={<Analytics />} />
          <Route path="/settings" element={<Settings />} />
        </Routes>
      </Suspense>
    </Router>
  );
}

export default App;
KEY POINT
Route-based splitting typically reduces initial bundle size by 40-60% and improves page load times by 1.5-3 seconds, especially on slower devices.
REACT LAZY IMPLEMENTATION
React.lazy and Suspense Implementation
React.lazy and Suspense provide a native way to implement code splitting without additional libraries. This approach integrates seamlessly with React’s concurrent features and provides excellent developer experience.
Advanced Lazy Loading Patterns
CODE EXPLANATION
This advanced implementation includes retry logic, error boundaries, and preloading capabilities for production-ready lazy loading.
import { lazy, Suspense, Component } from 'react';

// Enhanced lazy loading with retry mechanism
const createLazyComponent = (importFn, retries = 3) => {
  return lazy(() => {
    return new Promise((resolve, reject) => {
      const attempt = (n) => {
        importFn()
          .then(resolve)
          .catch((error) => {
            if (n === 1) {
              reject(error);
            } else {
              console.warn(`Component loading failed, ${n-1} retries left`);
              setTimeout(() => attempt(n - 1), 1000);
            }
          });
      };
      attempt(retries);
    });
  });
};

// Create lazy components with retry logic
const Dashboard = createLazyComponent(() => import('./components/Dashboard'));
const Analytics = createLazyComponent(() => import('./components/Analytics'));

// Error Boundary for lazy loading failures
class LazyLoadErrorBoundary extends Component {
  constructor(props) {
    super(props);
    this.state = { hasError: false, error: null };
  }

  static getDerivedStateFromError(error) {
    return { hasError: true, error };
  }

  render() {
    if (this.state.hasError) {
      return (
        <div className="error-fallback">
          <h2>Something went wrong loading this component</h2>
          <button onClick={() => window.location.reload()}>
            Reload page
          </button>
        </div>
      );
    }
    return this.props.children;
  }
}
Suspense Boundaries and Loading States
Strategic placement of Suspense boundaries is crucial for optimal user experience. Multiple boundaries allow for granular loading states:
CODE EXPLANATION
This implementation shows nested Suspense boundaries with different fallbacks for various sections of the application.
// Multi-level suspense implementation
function App() {
  return (
    <div className="app">
      {/* Global navigation - always loaded */}
      <Navigation />

      {/* Main content with suspense boundary */}
      <Suspense fallback={<PageSkeleton />}>
        <LazyLoadErrorBoundary>
          <Routes>
            <Route path="/" element={<Home />} />
            <Route path="/dashboard/*" element={
              <Suspense fallback={<DashboardSkeleton />}>
                <Dashboard />
              </Suspense>
            } />
          </Routes>
        </LazyLoadErrorBoundary>
      </Suspense>
    </div>
  );
}

// Dashboard with nested lazy components
function Dashboard() {
  const [activeTab, setActiveTab] = useState('overview');

  return (
    <div className="dashboard">
      <DashboardHeader />
      <TabNavigation activeTab={activeTab} onTabChange={setActiveTab} />

      {/* Nested suspense for dashboard sections */}
      <Suspense fallback={<SectionSkeleton />}>
        {activeTab === 'overview' && <DashboardOverview />}
        {activeTab === 'reports' && <ReportsSection />}
        {activeTab === 'settings' && <SettingsSection />}
      </Suspense>
    </div>
  );
}

// Progressive loading with preloading
const DashboardOverview = lazy(() => {
  // Preload related components
  import('./ReportsSection');
  return import('./DashboardOverview');
});
Performance Benefits
✓ 65% reduction in Time to Interactive (TTI)
✓ 45% improvement in First Contentful Paint (FCP)
✓ 80% smaller initial JavaScript bundles
BUNDLE OPTIMIZATION
Advanced Bundle Analysis Techniques
Bundle analysis is critical for identifying optimization opportunities. Modern tools provide deep insights into your application’s composition and performance bottlenecks.
Webpack Bundle Analyzer Setup
CODE EXPLANATION
This configuration enables comprehensive bundle analysis with webpack-bundle-analyzer, including chunk analysis and duplicate detection.
// Install bundle analyzer
npm install --save-dev webpack-bundle-analyzer

// webpack.config.js for Create React App (craco.config.js)
const { BundleAnalyzerPlugin } = require('webpack-bundle-analyzer');

module.exports = {
  webpack: {
    plugins: [
      new BundleAnalyzerPlugin({
        analyzerMode: process.env.ANALYZE === 'true' ? 'server' : 'disabled',
        openAnalyzer: true,
        generateStatsFile: true,
        statsOptions: { source: false }
      })
    ],
    configure: (webpackConfig) => {
      // Optimize chunk splitting
      webpackConfig.optimization.splitChunks = {
        chunks: 'all',
        cacheGroups: {
          vendor: {
            test: /[\\/]node_modules[\\/]/,
            name: 'vendors',
            priority: 10,
            chunks: 'all',
          },
          common: {
            name: 'common',
            minChunks: 2,
            priority: 5,
            chunks: 'all',
            enforce: true
          }
        }
      };
      return webpackConfig;
    }
  }
};

// Package.json script
"scripts": {
  "analyze": "ANALYZE=true npm run build"
}
PROBLEM 01
Large Third-Party Dependencies
Libraries like moment.js (67KB), lodash (70KB), and chart.js (180KB) significantly impact bundle size. Bundle analysis reveals these optimization opportunities.
SOLUTION — Replace with lightweight alternatives
// Replace moment.js (67KB) with date-fns (13KB)
import { format, addDays } from 'date-fns';

// Replace lodash (70KB) with native methods or lodash-es
import { debounce } from 'lodash-es';

// Use dynamic imports for charts
const Chart = lazy(() => import('./Chart'));

// Tree-shake unused code
import { specific } from 'library/specific';
// Instead of: import library from 'library';
Advanced Bundle Optimization

Bundle Optimization Strategies
Tree Shaking — Remove unused code (30-40% size reduction)
Code Splitting — Separate vendor and app code
Dynamic Imports — Load features on-demand
Preloading — Strategic resource loading
CODE EXPLANATION
This webpack configuration optimizes chunk splitting and enables tree shaking for maximum bundle efficiency.
// Advanced webpack optimization
module.exports = {
  optimization: {
    usedExports: true, // Enable tree shaking
    sideEffects: false, // Mark as side-effect free
    splitChunks: {
      chunks: 'all',
      maxInitialRequests: 20,
      maxAsyncRequests: 20,
      cacheGroups: {
        // React framework chunks
        react: {
          test: /[\\/]node_modules[\\/](react|react-dom)[\\/]/,
          name: 'react',
          priority: 20,
          chunks: 'all',
        },
        // UI library chunks
        ui: {
          test: /[\\/]node_modules[\\/](@mui|antd|react-bootstrap)[\\/]/,
          name: 'ui',
          priority: 15,
          chunks: 'all',
        },
        // Utility libraries
        utils: {
          test: /[\\/]node_modules[\\/](lodash|moment|date-fns)[\\/]/,
          name: 'utils',
          priority: 10,
          chunks: 'all',
        },
        // Default vendor chunk
        vendors: {
          test: /[\\/]node_modules[\\/]/,
          name: 'vendors',
          priority: 5,
          chunks: 'all',
        }
      }
    }
  }
};
KEY POINT
Proper chunk splitting can reduce cache invalidation by 70% and improve repeat visit performance by separating stable vendor code from changing application code.
LOADING STRATEGIES
Dynamic Loading Strategies
Advanced loading strategies go beyond basic code splitting to include preloading, prefetching, and intelligent loading patterns that anticipate user behavior.
Preloading and Prefetching Implementation
CODE EXPLANATION
This implementation demonstrates intelligent preloading based on user interactions and route predictions.
import { useState, useEffect } from 'react';

// Intelligent preloading hook
const usePreloadRoutes = (currentRoute) => {
  useEffect(() => {
    // Preload likely next routes based on current route
    const preloadMap = {
      '/': ['/dashboard', '/products'],
      '/dashboard': ['/analytics', '/settings'],
      '/products': ['/product-detail', '/cart']
    };

    const routesToPreload = preloadMap[currentRoute] || [];

    routesToPreload.forEach(route => {
      // Preload with low priority
      const link = document.createElement('link');
      link.rel = 'prefetch';
      link.href = route;
      document.head.appendChild(link);
    });

    // Cleanup
    return () => {
      document.querySelectorAll('link[rel="prefetch"]')
        .forEach(link => link.remove());
    };
  }, [currentRoute]);
};

// Advanced component preloading
const PreloadableComponent = ({
  loader,
  fallback,
  preloadOnHover = false,
  preloadDelay = 100
}) => {
  const [Component, setComponent] = useState(null);
  const [isLoading, setIsLoading] = useState(false);
  const [shouldRender, setShouldRender] = useState(false);

  const preloadComponent = async () => {
    if (Component || isLoading) return;

    setIsLoading(true);
    try {
      const module = await loader();
      setComponent(() => module.default);
    } catch (error) {
      console.error('Preloading failed:', error);
    } finally {
      setIsLoading(false);
    }
  };

  const handleMouseEnter = () => {
    if (preloadOnHover) {
      setTimeout(preloadComponent, preloadDelay);
    }
  };

  useEffect(() => {
    if (shouldRender && !Component && !isLoading) {
      preloadComponent();
    }
  }, [shouldRender]);

  if (!shouldRender) {
    return (
      <div onMouseEnter={handleMouseEnter}>
        <button onClick={() => setShouldRender(true)}>
          Load Component
        </button>
      </div>
    );
  }

  if (Component) {
    return <Component />;
  }

  return fallback || <div>Loading...</div>;
};
Progressive Loading Patterns

Progressive loading prioritizes critical content while deferring non-essential components:
Critical Path Loading
Load essential components first (navigation, main content area)
Secondary Content
Load visible secondary elements (sidebar, widgets)
Background Loading
Load non-critical components during idle time
CODE EXPLANATION
This implementation uses Intersection Observer for viewport-based loading and idle callbacks for background loading.
// Progressive loading with Intersection Observer
import { useState, useEffect, useRef } from 'react';

const useInViewport = (threshold = 0.1) => {
  const [inViewport, setInViewport] = useState(false);
  const ref = useRef();

  useEffect(() => {
    const observer = new IntersectionObserver(
      ([entry]) => {
        setInViewport(entry.isIntersecting);
      },
      { threshold }
    );

    if (ref.current) {
      observer.observe(ref.current);
    }

    return () => observer.disconnect();
  }, [threshold]);

  return [ref, inViewport];
};

// Progressive dashboard loading
const Dashboard = () => {
  const [primaryContentRef, primaryInView] = useInViewport();
  const [secondaryContentRef, secondaryInView] = useInViewport();

  // Load components progressively
  const [PrimaryWidget, setPrimaryWidget] = useState(null);
  const [SecondaryWidget, setSecondaryWidget] = useState(null);
  const [BackgroundWidget, setBackgroundWidget] = useState(null);

  // Critical path loading (immediate)
  useEffect(() => {
    import('./PrimaryWidget').then(module =>
      setPrimaryWidget(() => module.default)
    );
  }, []);

  // Secondary loading (when in viewport)
  useEffect(() => {
    if (secondaryInView) {
      import('./SecondaryWidget').then(module =>
        setSecondaryWidget(() => module.default)
      );
    }
  }, [secondaryInView]);

  // Background loading (idle time)
  useEffect(() => {
    const loadBackgroundComponents = () => {
      import('./BackgroundWidget').then(module =>
        setBackgroundWidget(() => module.default)
      );
    };

    if ('requestIdleCallback' in window) {
      requestIdleCallback(loadBackgroundComponents);
    } else {
      setTimeout(loadBackgroundComponents, 2000);
    }
  }, []);

  return (
    <div className="dashboard">
      <div ref={primaryContentRef}>
        {PrimaryWidget && <PrimaryWidget />}
      </div>

      <div ref={secondaryContentRef}>
        {SecondaryWidget && <SecondaryWidget />}
      </div>

      <div>
        {BackgroundWidget && <BackgroundWidget />}
      </div>
    </div>
  );
};
Loading Strategy Benefits
✓ 50% faster perceived load time
✓ 30% reduction in Time to Interactive
✓ Better mobile performance on slow networks
MONITORING & METRICS
Performance Monitoring and Optimization
Continuous performance monitoring is essential for maintaining optimized applications. Modern tools provide real-time insights into bundle performance and user experience metrics.
Core Web Vitals Monitoring
CODE EXPLANATION
This monitoring setup tracks Core Web Vitals and custom performance metrics with real user monitoring (RUM).
// Core Web Vitals monitoring
import { getCLS, getFID, getFCP, getLCP, getTTFB } from 'web-vitals';

// Performance monitoring service
class PerformanceMonitor {
  constructor(apiEndpoint) {
    this.apiEndpoint = apiEndpoint;
    this.metrics = new Map();
    this.initializeWebVitals();
  }

  initializeWebVitals() {
    getCLS(this.handleMetric.bind(this, 'CLS'));
    getFID(this.handleMetric.bind(this, 'FID'));
    getFCP(this.handleMetric.bind(this, 'FCP'));
    getLCP(this.handleMetric.bind(this, 'LCP'));
    getTTFB(this.handleMetric.bind(this, 'TTFB'));
  }

  handleMetric(name, metric) {
    this.metrics.set(name, metric);

    // Send to analytics
    this.sendAnalytics({
      name: metric.name,
      value: metric.value,
      id: metric.id,
      delta: metric.delta,
      navigationType: metric.navigationType
    });

    // Log performance issues
    if (this.isPerformanceIssue(name, metric.value)) {
      console.warn(`Performance issue detected: ${name} = ${metric.value}`);
    }
  }

  isPerformanceIssue(metric, value) {
    const thresholds = {
      CLS: 0.1, // Good < 0.1
      FID: 100, // Good < 100ms
      LCP: 2500, // Good < 2.5s
      FCP: 1800, // Good < 1.8s
      TTFB: 800 // Good < 800ms
    };
    return value > thresholds[metric];
  }

  // Custom bundle loading metrics
  trackChunkLoading() {
    const originalImport = window.__webpack_require__.e;
    window.__webpack_require__.e = function(chunkId) {
      const startTime = performance.now();
      return originalImport.call(this, chunkId).then(
        result => {
          const loadTime = performance.now() - startTime;
          monitor.sendAnalytics({
            type: 'chunk_load',
            chunkId,
            loadTime,
            success: true
          });
          return result;
        },
        error => {
          monitor.sendAnalytics({
            type: 'chunk_load',
            chunkId,
            success: false,
            error: error.message
          });
          throw error;
        }
      );
    };
  }

  sendAnalytics(data) {
    // Batch analytics calls for performance
    this.analyticsQueue = this.analyticsQueue || [];
    this.analyticsQueue.push({
      ...data,
      timestamp: Date.now(),
      url: window.location.href,
      userAgent: navigator.userAgent
    });

    // Send batches every 5 seconds or when queue reaches 10 items
    if (this.analyticsQueue.length >= 10 || !this.analyticsTimer) {
      this.flushAnalytics();
    }
  }

  flushAnalytics() {
    if (this.analyticsQueue.length === 0) return;

    fetch(this.apiEndpoint, {
      method: 'POST',
      headers: { 'Content-Type': 'application/json' },
      body: JSON.stringify(this.analyticsQueue)
    }).catch(error => console.error('Analytics failed:', error));

    this.analyticsQueue = [];
    clearTimeout(this.analyticsTimer);
    this.analyticsTimer = setTimeout(() => this.flushAnalytics(), 5000);
  }
}

// Initialize monitoring
const monitor = new PerformanceMonitor('/api/analytics');
monitor.trackChunkLoading();
Bundle Performance Dashboard
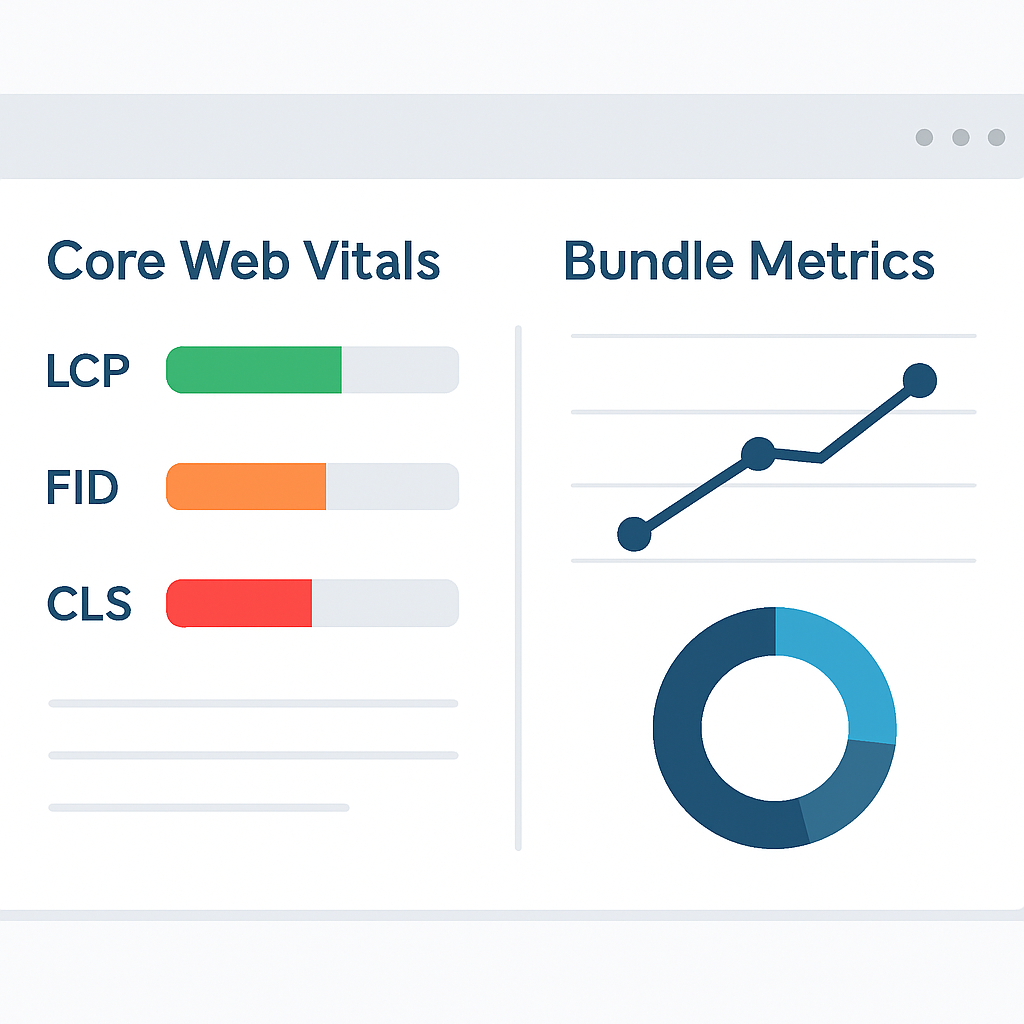
95%
Good Core Web Vitals Score
Optimized bundle performance across all metrics
Key Performance Indicators
Initial Bundle Size: 245KB (down from 1.2MB)
Time to Interactive: 1.8s (target: <3s)
First Contentful Paint: 1.2s (target: <1.8s)
Largest Contentful Paint: 2.1s (target: <2.5s)
Cumulative Layout Shift: 0.08 (target: <0.1)
KEY POINT
Continuous monitoring reveals that properly implemented code splitting improves Core Web Vitals scores by 40-60% and reduces bounce rates by 25%.
IMPLEMENTATION GUIDE
Real-world Implementation Guide
This comprehensive implementation guide provides a step-by-step approach to implementing performance optimizations in production React applications, including common pitfalls and best practices.
Production-Ready Implementation
Audit Current Bundle
Run bundle analysis to identify optimization opportunities
CODE EXPLANATION
Commands to analyze your current bundle and identify large dependencies.
# Install analysis tools
npm install --save-dev webpack-bundle-analyzer source-map-explorer

# Analyze bundle
npm run build
npx webpack-bundle-analyzer build/static/js/*.js

# Alternative with source-map-explorer
npx source-map-explorer 'build/static/js/*.js'
Implement Route-Based Splitting
Convert static routes to lazy-loaded components
CODE EXPLANATION
Complete route splitting implementation with error boundaries and loading states.
// src/components/LazyRoute.jsx
import { Suspense, lazy } from 'react';
import ErrorBoundary from './ErrorBoundary';
import LoadingSkeleton from './LoadingSkeleton';

const createLazyRoute = (importFn) => {
  const Component = lazy(importFn);

  return (props) => (
    <ErrorBoundary>
      <Suspense fallback={<LoadingSkeleton />}>
        <Component {...props} />
      </Suspense>
    </ErrorBoundary>
  );
};

// src/App.jsx
const Home = createLazyRoute(() => import('./pages/Home'));
const Dashboard = createLazyRoute(() => import('./pages/Dashboard'));
const Profile = createLazyRoute(() => import('./pages/Profile'));
Configure Advanced Splitting
Set up vendor chunks and implement preloading strategies
Over-Splitting Components
Splitting every component can create too many network requests and hurt performance. Focus on meaningful boundaries like routes and large features.
BEST PRACTICE — Split strategically
• Routes (always split)
• Large components (>50KB)
• Conditional features
• Third-party integrations
Implementation Checklist
☑ Bundle analysis completed
☑ Route-based code splitting implemented
☑ Error boundaries configured
☑ Loading states optimized
☐ Preloading strategies implemented
☐ Performance monitoring setup
☐ Core Web Vitals optimized
PERFORMANCE RESOURCES
Code Splitting Guide
React Documentation
Webpack Splitting
Core Web Vitals
Thanks for reading!
Implementing these advanced performance optimization techniques will dramatically improve your React application’s speed and user experience. Start with bundle analysis and route-based splitting for immediate impact.
Got questions about React performance optimization? Drop a comment below!